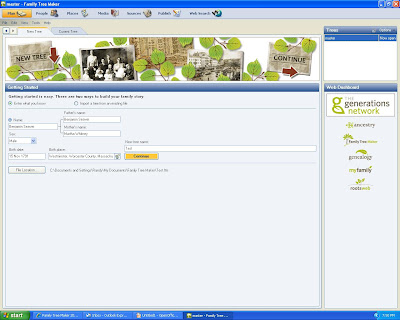
In this post, I'm going to start a brand new family tree and determine how to enter data to create a family structure.
In the [Plan] icon screen (note it is highlighted in the screen shot below), I am in the [New Tree] tab and have entered the name "Benjamin Seaver" in the first box, his gender "Male", his parents "Benjamin Seaver" and "Martha Whitney" as his parents, and his birth date and place in the boxes provided. I also added the Tree name "test" in the New tree box.

I wanted to add a spouse to Benjamin Seaver, so I clicked on the [People] icon and in the [Family] view tab, I clicked on the [Add] icon button on the top right of the screen. The [Add] choices are Add Father, Add Mother, Add Spouse, Add Child and Add Unrelated Person. I chose Add Spouse.
When I clicked on Add Spouse, a small box where I could add the name of the spouse and her gender as shown below.
I added "Abigail Gates" and clicked on "Female" and clicked OK. Abigail Gates was added to the [Family] view and boxes for her birth and death information were open in the right-hand panel on the screen. I added her birth and death dates and places, and their marriage date and place, from my records.

That wasn't so bad, was it? Again, it's almost intuitive. Once you figure it out, you find the shortcuts that make entering data fairly efficient.
Starting the new database file took just a minute or so, and adding Benjamin Seaver and Abigail Gates birth, marriage and death information took just two minutes, including finding a paper file with the information.
In the next post, I'll add a source to some of the information I just created, and after that I'll add some children to this couple.
Previous posts in this series:
* Using FamilyTreeMaker 2008 - Post 1: Loading. Installing the program and uploading an existing database file.
* Using FamilyTreeMaker 2008 - Post 2: Exploring. Looking around the uploaded database file to see what the different views look like.
* Using FamilyTreeMaker 2008 - Post 3: The Menus. Most of the menus were itemized and described.


No comments:
Post a Comment